3D Animation
Photography without the camera.
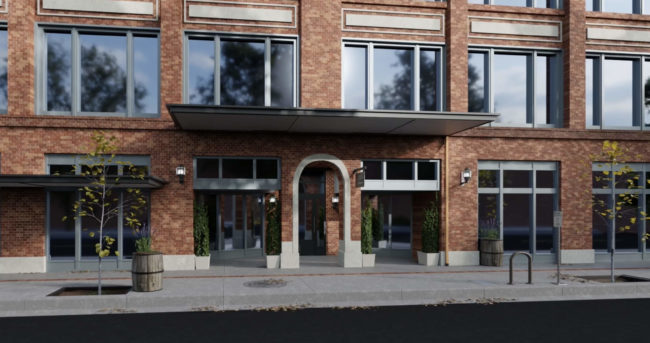
3D isn’t just for cartoon characters. It’s great for producing photorealistic images so good the viewer doesn’t realize it was computer-generated. There are so many different ways you can incorporate 3D animation and rendering into your existing branding and marketing workflow, whether it’s illustrating a character, visualizing a product that doesn’t exist yet, bringing an architectural design to life, or simply using it in place of traditional photography. Check out the example below, rendering completely in 3D.
Why 3D? Why not just take a picture?
Let’s say you’re releasing a new product or looking for funding for an idea. You’re going to need to show people what it looks like. Depending on the situation, 3D may be more affordable or more practical than a photo shoot. Using 3D in place of traditional photography is great for:
- Objects that are hard to photograph, whether they’re extremely large like a weather tower, or extremely small like a medical implant.
- Products that are still in the design phase and don’t yet exist (don’t rely on napkin sketches or clunky CAD fly-throughs)
- Shoots were you’d like complete control over every aspect of the shot, such as lighting and backgrounds.
This last point is key. Imagine you pay a team to photograph your new product. You get the photos back, and decide the color is wrong, or you’d like the product angled in a different direction, or you’d like it placed within a different setting. With traditional photography, this requires a complete new shoot, which gets expensive.
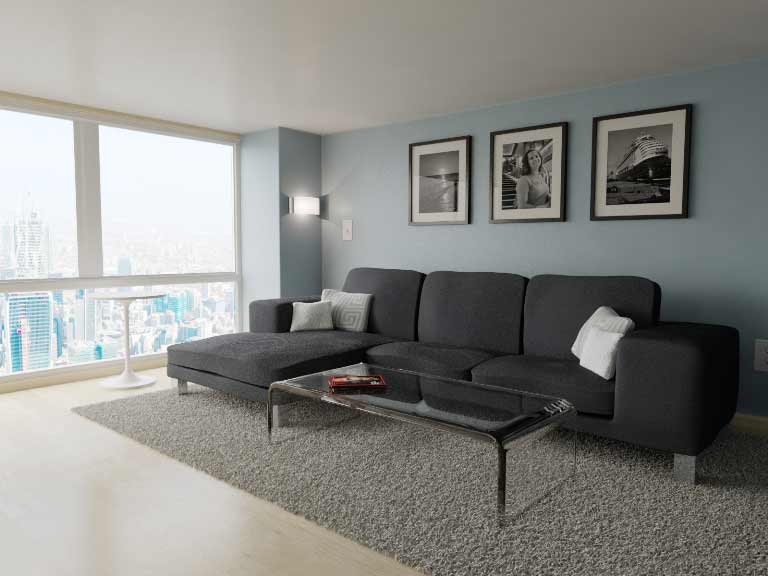
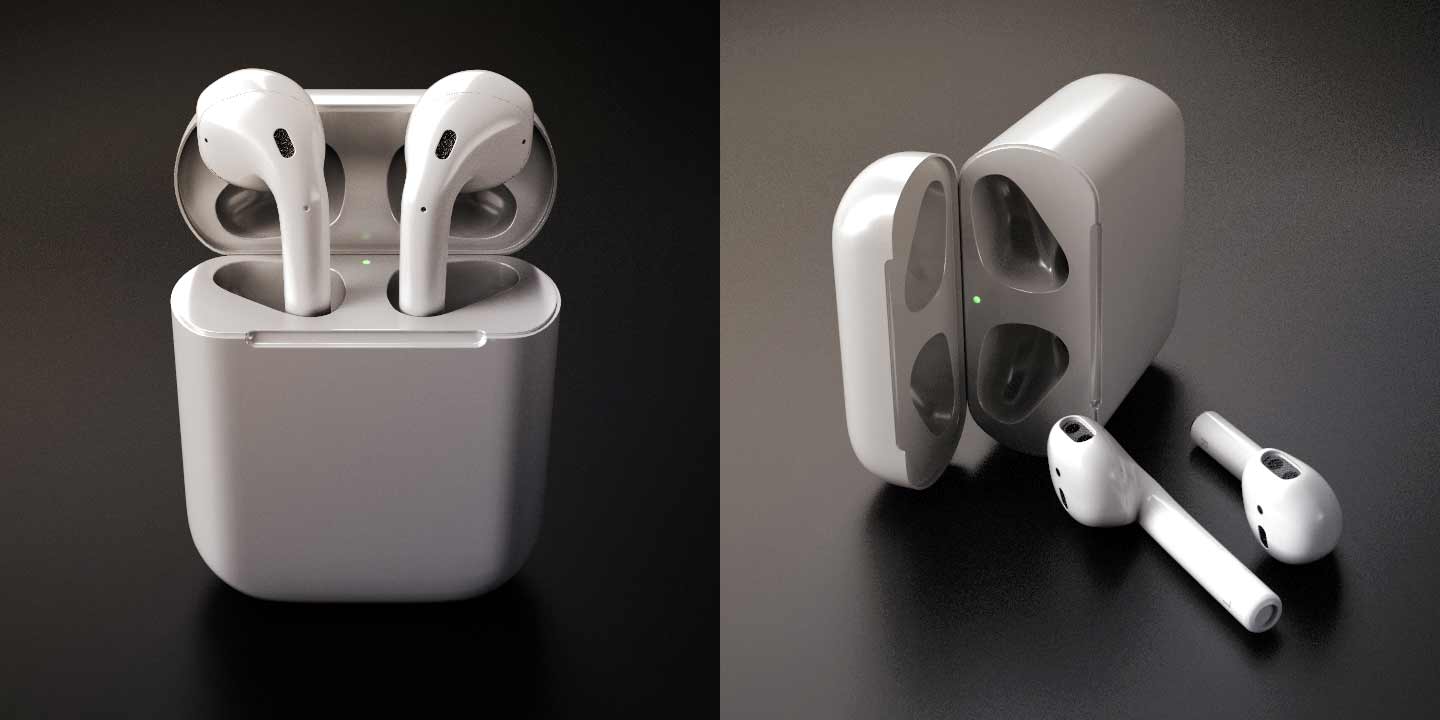
3D Product Visualization
3D animation can really bring your product images and visualization to life, whether the product already exists or not. Often this is done with animations showing either the product functioning by itself, or a cut-away animation showing the interior mechanisms at work (something really hard to show often with traditional photography). Check out this example below illustrating a product without resorting to boring CAD renders.
The process
The process for creating these is pretty straightforward, though it often depends on if we need to create any models from scratch, how long the animation might be, and what sort of environment or effects need to happen.
We’ll usually start with a discussion about what needs to happen. Is this a simple product in a studio setting type render, or do we need to create a real world virtual environment for this object to live in? We’ll go over details like what needs to be shown, what sort of animation needs to happen, and how long we anticipate the animation needs to be. This is also the time to figure out if there are existing CAD models we can use, or if we need to create 3d models from scratch. From there, we’ll create a set of storyboards we can go back and forth on to make sure that we have all of the shots lined up before we start any animation work.
Once the storyboards are approved, we’ll start doing any modeling, texturing, and animation that’s required for the project. Before doing final renders (i.e. the final product of the process), we’ll create what are commonly referred to as “playblasts”, or low quality movies that help illustrate how each shot in 3d will look and show the exact timing and animation in real time. We’d also render out a couple of full quality still frames so we can make sure the final look of the shots is nailed down. Once this is approved, we do the final render of converting each frame of the sequence to a high quality render, and hand over the final animation.